
A problem with sciatica usually occurs when you have a protruding or herniated disc and it pinches the nerve. The pain may start in the lower back but it can also travel along the sciatic nerve and affect the hip and the back of the leg. Some people even have a difficulty with weakness or numbness in the leg or foot.
- See Sciatica – Symptoms, Causes, Diagnosis and Prevention
- See What’s the Best Treatment for Sciatica? (Effective Home Remedies for Sciatica)
According to one study, many individuals who suffer from chronic back pain but also did yoga saw a 64% reduction in their pain and 77% reduction in their disability after only 16 weeks. It is also possible for you to reduce the pain you are experiencing with piriformis. There are a number of back stretches specifically designed to provide that benefit. This type of the stretching program may help you to get relief within weeks. After stretching twice a day, your muscles may relax and it could get rid of the problems associated with sciatica.
13 Easy Exercises for Sciatica Pain Relief
The 13 exercises outlined in this article can be performed by almost anyone. With the assistance of these stretches, the lower back area can be targeted to stop a problem with sciatic pain and even to stop it from occurring in the future. Let’s get started!
1. Reclined Pigeon and Preparatory Stretch
Begin with your knees bent so that the heels are under the knees. Place the hands in front of the thighs and slide them to the base of the leg where it touches the pelvis. The heel of each hand should be pressed into the leg bone at the bottom. At this point, your right leg should be lifted and crossed over the left leg. Arch your back slightly, grab your thighs from the back and push with your legs into your hands. This move should be held for several deep breaths. Repeat with the other side.
2. Stretch for Your Piriformis
Bend your knees and place both feet on the floor flatly while lying on your back. Your right ankle should be over your left knee and pulled the left thigh up toward the chest. This stretch should be held for 30 seconds and then repeated on the other side. Don’t forget to flex your foot so that you don’t hurt your knee.
3. Hamstring Stretch (Lying Position)
Begin by lying on the back and extend your right leg forward. Place your hands behind your left knee and lift the leg to bend the knee toward the torso. You should feel a stretch at the back of the thigh. Continue the stretch by slowly straightening your leg. Hold this position for 10 seconds, relax and then repeat with the other leg. This exercise should be repeated 10 times and you can work your way up to 30 seconds per side
4. Hamstring Stretch (Seated)
The seated hamstring stretch is performed while seated on a chair. Be sure to choose a sturdy chair without wheels. Keep your knees straight and your heels on the floor while extending your legs forward as far as they will reach. Reach forward to touch the toes and you should feel a stretch in the upper legs. Be sure to keep the spine straight during this maneuver. This stretch should be held for 30 seconds and repeated 10 times.
5. Triangle Extensions
The extended triangle pose can work well to relieve sciatic pain. Stand with your feet wider than the width of the shoulders. The left foot should be turned 45 degrees out while keeping the right foot pointed forward. Hold your arms to the side with your palms down and parallel to the floor. With your left hand, reach to the left and exhale slowly. At the same time, lean your torso to the left by bending the left hip and grab your left ankle. Your left rib cage should be rotated toward the ceiling and your right hand stretched upward. Be sure to maintain a neutral position with your head. Hold this pose 30 seconds, take a deep breath and reverse the movements to the starting position. Repeat on the other side.
6. Deep Lunge
Begin this exercise in a runner’s lunge with your knee over your ankle, right leg forward and left knee on the ground. Your hands should be rested on the right thigh as you lift your torso slowly. Lean forward slightly at the hips, maintaining the position of your right knee behind the toes. The stretch should be felt in the left flexor. You can hold this position or raise your arms overhead for a deeper stretch. Maintain this position for 30 seconds and repeat on the other side.
7. Cow’s Face Pose (Reclining)
To begin this exercise, your left leg should be crossed over your right leg while you are lying face up. Flex both feet while raising the legs off of the floor. Reach for the outside of the ankles, holding the legs close toward your body. Your feet should stay flexed with the toes spread and this position should be held for a few breaths. Switch sides and repeat.
8. Pigeon Pose
This exercise is also started with the right leg forward, knee over the ankle and the back leg straight. Slowly walk your right foot toward the left side and then drop your thigh and shin to the floor. Be sure that your right knee and hip maintain a straight line. Your left leg should rest on the floor with the upper left foot facing downward. Square the hips, hold, and then lower your torso downward. Your head should be resting on your forearms. Hold this pose 30 seconds and repeat on the other side. During this exercise, a moderate stretch should be felt in the outside of the right thigh. If it feels uncomfortable, discontinue this exercise.
9. The Frog Pose Stretch
If you don’t have a problem with your knees or ankles, you may find that most inner eye openers are too easy. The frog pose may help. Begin with your palms on the floor on your hands and knees. Rest your knees on a mat or blanket. Begin by widening the knees slowly until you feel the stretch comfortably on the inside of the thighs. Each calf and foot should maintain contact with the floor. Be sure that your knees are kept in line with your ankles. Lower to your forearms and maintain for 30 seconds.
10. Cat Pose
This exercise is relatively straightforward. Stand on the ground on your hands and knees and begin by bending the back slowly and lifting the chest gently using your shoulder muscles. Continue to breathe normally and deeply for approximately 10 seconds as you hold this pose. Return your back to the flat position, tuck the chin to the chest and raise the back slowly. Hold for 10 seconds and then relax. This exercise can be performed for 2 minutes.
11. Downward Dog
This classic yoga maneuver is perhaps one of the better known but it can go a long way in helping to stretch your lower back and hamstrings to reduce sciatica pain. Begin on your hands and knees, keeping your knees below the hips and your hands slightly forward from your shoulders. Press your hands to the floor while tucking your toes and lift your knees upward. Straighten the legs until you feel a slight hamstring stretch. Your body should appear to be a “V” upside down. Be cautious about allowing your head to sag; maintain its position between the upper arms. Hold for 10 seconds and repeat up to 10 times. Work your way up to 30 seconds.
12. Hip Rotator with Foam Roll
A foam roller should be placed under the thighs while you are seated on the floor. Roll your buttocks and legs over the roller. You can then lie on the side to roll out the calf and outer thigh muscles. Switch positions so that the roll is under the stomach to roll out the area from the top of the knees to the hip. Continue to repeat each section for 1 minute.
13. Self-Guided Trigger Point Therapy
A tennis or lacrosse ball can be very effective at targeting trigger points to relieve sciatica pain. Begin with a painful spot on your leg muscles. Hold the ball in that area and then relax your weight on to the ball. Hold this position up to 60 seconds or until you feel the pain lesson. Continue on to another painful spot. You can perform this exercise for up to 10 minutes.
Youtube: Sciatica Exercises
Extra Tips for Stretching: Exercising Wisely
Prior to starting any type of exercise or stretching program, a physician should be consulted. Always maintain control of your movements without jerking or bouncing. During the time that you are stretching, you should pay attention to your breath and make it rhythmic and deep. If you are unfamiliar with the exercises, consult a physical therapist.
Many people make the mistake of feeling that watching a YouTube video or television program will allow them to have perfect form. Most people who do those exercises have years of experience and plenty of flexibility. You should never feel pain during stretching and if you do, stop right away.
If you continue to experience sciatic pain for 30 days, you should consult with a physical therapist or doctor. They may be able to tailor an in-home exercise program to target your specific problem.
Avoid the Following Sciatica Exercises
Exercises Targeting the Lower Back
The issue with sciatic compression is in the lower back so putting too much of a load in that area could cause further damage. It may keep the muscle or disk that is irritating the nerve from releasing the pressure. Any exercises that cause excessive stress on the lower back should be avoided. After experiencing the injury, you should avoid doing any weight-bearing exercises for up to 8 weeks. Even after you have a rehabilitated, it may be wise to avoid exercises such as the dead left and squat.
Exercises Targeting the Legs
Your sciatic nerve may also be further irritated with certain leg exercises. If you do any hip or leg exercises, you should begin with either your body weight or a very light exterior weight. Working out with too much weight can cause the sciatic pain to relapse. During core exercises, keep the legs straight to avoid placing too much stress on your muscles that may already be weak.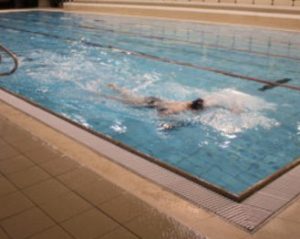
Exercises that are High Impact
You may experience some benefit from low-impact aerobics but any high impact exercises should be avoided. This would include high intensity interval training (HIIT), especially immediately after the injury took place. Low-impact exercises such as walking or swimming are beneficial.
Conclusion
Even though you may be suffering from pain due to sciatica now, it doesn’t need to be a permanent condition. Continue to do the exercises outlined in this article and in doing so, you may lower your pain significantly. Above all, be sure to contact a physician prior to beginning any exercise program.

I’m Lucas. I used to be a back pain sufferer, but I’ve recovered. I created BestforBackPain.com to help others find relief without going to physical therapy or expensive medication.